Menu

Popular Posts

Showing posts with label နည္းပညာ. Show all posts

Wednesday, September 28, 2011

Online Security အတြက္ အခ်က္ (၁၀) ခ်က္

လြန္ခဲ႕တဲ့ ႏွစ္အနည္းငယ္ အတြင္း ကမာၻတစ္၀ွမ္းလံုးမွာ အင္တာနက္ သံုးစြဲမႈႏႈန္း

ရုတ္တရက္ ျမင္႕တက္လာတဲ့ နည္းတူပဲ အြန္လိုင္းကေန တဆင္႕ အခ်က္အလက္ ခိုးယူမႈ၊ ဘဏ္အေကာင္႕ နံပါတ္ခုိးယူ သံုးစြဲမႈ၊ စတဲ့ ဆိုက္ဘာ ဒုစရုိက္မႈေတြလည္း တေျပးညီ ျမင့္တက္ လာခဲ႕ပါတယ္။
ဒီေန႕ေခတ္ရဲ႕ အင္တာနက္သံုးစြဲသူအားလံုးရဲ႕ 91% ဟာအြန္လိုင္း အႏၲရာယ္ေတြရဲ႕ ျခိမ္းေျခာက္ခံေနရၿပီး ဘယ္ကုိကာကြယ္ရမလဲဆိုတာလဲ မသိၾကရပါဘူး။ ဒါေၾကာင့္ ကိုယ့္ရဲ႕ Online Security အတြက္ လံုျခံဳ စိတ္ခ်ရေအာင္ ကာကြယ္ေပးႏိုင္တဲ့ အခ်က္ (၁၀) ခ်က္ကို ေအာက္မွာ ေဖာ္ျပေပးလိုက္ ပါတယ္။
 
နံပါတ္ (၁)
သင္႕ကြန္ပ်ဴတာမွာ ေကာင္းမြန္တဲ႕ Antivirus နဲ႕ Anti-spyware ေတြ Install လုပ္ထားဖို႕လိုအပ္ၿပီး အျမဲ Up-to-date ျဖစ္ေနေအာင္ ျပဳလုပ္ထားသင္႕ပါတယ္။ Recommended ေပးထားတဲ႕ Anti-spyware ေတြကို ဒီလင္႕ခ္မွာ ၾကည္႕ရႈႏိုင္ပါတယ္။
နံပါတ္(၂)
ကိုယ္ကိုယ္တိုင္ သိတဲ႕၊ သံုးေနက်ျဖစ္တဲ႕၊ ယံုၾကည္ရတဲ႕ website ေတြကိုသာ ၀င္ေရာက္ၾကည္႕ရႈသင္႕ပါတယ္။ တကယ္လို႕ သင္မသိတဲ႕ တစ္ခါမွ မသံုးဘူးတဲ႕ website တစ္ခုကို ၀င္ၾကည္႕မယ္ဆိုရင္ေတာ႕ ေၾကာ္ျငာ(Ad) ေတြ၊ ေခါင္းစည္း(Banner) ေတြကို Click မႏွိပ္မိဖို႕ သတိထားပါ။
နံပါတ္(၃)
Email ကတဆင္႕ ေရာက္ရွိလာတဲ႕ Attachment File ေတြကို Download မယူခင္ေရာ ယူၿပီး မ Run ခင္မွာပါ Virus Scan စစ္ေဆးပါ။
နံပါတ္(၄)
သင္႕ရဲ႕ Operating System နဲ႕ Browser တို႕ကို ပံုမွန္ Update ျပဳလုပ္ေပးပါ။ ပိုေကာင္းတဲ႕ လံုျခံဳေရးအတြက္ဆိုရင္ အင္တာနက္သံုးစြဲတဲ႕အခါ ကိုယ္သံုးတဲ႕ Browser ရဲ႕ ေနာက္ဆံုးထုတ္ Version ကိုအသံုးျပဳၿပီး သံုးစြဲသင္႕ပါတယ္။
နံပါတ္(၅)
သင္႕ရဲ႕ Password ( Email, Bank Account ) ေတြကို ဘယ္သူ တစ္ဦးတစ္ေယာက္နဲ႕မွ ဘယ္လို အေၾကာင္းျပခ်က္ အတြက္ျဖစ္ေစ Share မသံုးမိပါေစနဲ႕။ Password ေရြးခ်ယ္တဲ႕အခါမွာလဲ Strong ျဖစ္ေအာင္ေရြးပါ။ Password တစ္ခုေရြးတဲ႕အခါ
1. Capital Letters
2. Small Letters
3. Symbols
4. Numbers

အထက္ပါ (၄) ခုအနက္ (၃) ခု ပါ၀င္သင္႕ပါတယ္။ Password ကိုလဲ (၃) လတစ္ႀကိမ္ေလာက္ အသစ္ေျပာင္းသင္႕ပါတယ္။ ၿပီးေတာ႕ အလြယ္တကူ ခန္႕မွန္းႏိုင္တဲ႕ Password မ်ိဳးေတြ မေပးသင္႕ပါဘူး။ ဥပမာေျပာရရင္- ဖုန္းနံပါတ္၊ ခ်စ္သူရည္းစားအမည္၊ စသည္ေပါ႕။
နံပါတ္(၆)
Website တစ္ခု ဖြင္႕မယ္ဆိုရင္ Browser Address Bar ေပၚမွာ URL ကုိ အျပည္႕အစံုရိုက္ပါ။ ဥပမာ သင္က Gmail ကို၀င္မယ္ဆိုရင္ http://mail.google.com လို႕ http:// ပါ ပါေအာင္ ရိုက္ပါ။
နံပါတ္(၇)
Login Page တစ္ခုမွာ Password ရိုက္ထည္႕ေတာ႕မယ္ဆိုရင္ အေပၚက Address မွာ http အစား https လို႕ ေျပာင္းေနလား ေသခ်ာေအာင္ၾကည္႕ပါ။ Https ဟာ SSL ( Secure Sockets Layer) ျဖစ္ၿပီး Http ထက္ ပိုၿပီး Security ေကာင္းပါတယ္။
နံပါတ္(၈)
Phishing Emails ( ေမးလ္အတုမ်ား ) ကိုသတိထားပါ။ သင္႕ထံေရာက္လာတဲ႕ ေမးလ္ေတြထဲက ဥပမာ- ဒီလင္႕ခ္ကို ႏွိပ္ၿပီး Account Settings ကို ေျပာင္းရန္ အစရွိသည္အားျဖင္႕ေဖာ္ျပထားတဲ႕ ေမးလ္ေတြက Link ေတြကိုမႏွိပ္မိပါေစနဲ႕။ သင္႕ကို Spoofed Pages ( Page အတု )ေတြဆီကို ေခၚသြားၿပီး Login ၀င္ခိုင္းႏိုင္လို႕ပါ။ Phishing နဲ႕ Spoofed အေၾကာင္း ေနာက္ပိုင္းမွာ အက်ယ္ရွင္းျပပါ႕မယ္။
နံပါတ္(၉)
အသံုးျပဳၿပီးတဲ႕အခါ အျမဲတမ္း Logout ထြက္ပါ။ Logout ထြက္ရံုတင္မက Browser ရဲ႕ Cache နဲ႕ History ေတြကို ရွင္းေပးပါ။ ( Mozilla Firefox မွာဆိုရင္ Tools ထဲက Clear Private Data ကိုႏွိပ္ၿပီး အမွန္အားလံုးျခစ္၊ Clear လုပ္ေပးပါ )
နံပါတ္(၁၀)
Internet Cafe ေတြက Public Computers ေတြမွာ Bank အေကာင္႕လို အေရးႀကီးတဲ႕ အခ်က္အလက္မ်ိဳးေတြ မသံုးစြဲပါနဲ႕။ သံုးရမယ္ဆိုရင္လဲ Spyware, keystroke-logger, password-sniffer ေတြလိုမ်ိဳး Software ေတြ အဲဒီ Computer ေတြမွာ Install လုပ္ထားမထား ေသခ်ာေအာင္လုပ္ပါ။
အထက္ပါအခ်က္ (၁၀) ခ်က္ကိုလိုက္နာျခင္းျဖင္႕ သင္႕အတြက္ ဆိုက္ဘာအႏၲရာယ္မွ 90% ကာကြယ္ ေပးႏိုင္ပါလိမ္႕မယ္။ ဆိုက္ဘာ တိုက္ခိုက္ခံရမႈ အႏ ၱရာယ္မွ ကင္းေ၀းၾကပါေစ။
မြန္ခိုက္ | PatheinCity News | ေဆာင္းပါး

Thursday, September 8, 2011

သင္႔အတြက္ ေလ႔လာစရာ ဝက္ဆုိဒ္ေကာင္းမ်ား

ကြ်န္ေတာ္ဆုိဒ္က Useful Link က ဆုိဒ္ေတြစုစည္းေပးတာ ကြ်န္ေတာ္ကိုယ္တုိင္ စုစည္းတာ မဟုတ္တာမ်ားတယ္ ။ ကြ်န္ေတာ္ေရးတဲ႔ ပုိစ္႔ေတြဆုိရင္ ေအာက္ဆုံးမွာ ကြ်န္ေတာ္နာမည္အျမဲတမ္းထည္႔တယ္ ။ ဒီတစ္ခါကြ်န္ေတာ္ ေလ႔လာစရာဝက္ဆုိဒ္ေတြကို တင္ေပးလုိက္ပါတယ္ ။ တစ္ခုခ်င္းကို မိတ္ဆက္ေပးဖုိ႔ မလြယ္လုိ႔ တစ္ခုခ်င္းစီသြားျပီး ။ မိမိဝါသနာပါရာကို ေလ႔လာႏုိင္ေၾကာင္းပါဗ်ာ ။ ေတာ္ေတာ္ေလးကို ေကာင္းပါတယ္ ။ ကြ်န္ေတာ္ေတာင္ အကုန္မၾကည္႔ရေသးေၾကာင္းပါ ။ 3D,2D  Design ,Photoshop Tutorial ဘာေတြညာေတြေတာ႔ စုံေနတာပဲဗ်ာ ။ ေလ႔လာၾကည္႔လုိက္စမ္းပါ ။ သင္႔အတြက္ အက်ိဳးရွိေစမွာပါ ။


(1)Pixel2life
(2)Good-Tutorials
(3)Tutorialized
(4)TutorialGarden
(5)TutorialOutpost
(6)Hacker News 
(7)FaqPal
(8)Luxa
(9)Graphic-Design-Links
(10)FStutorials
(11)PhotoshopRoadmap
(12)Tutorial-center
(13)Tipstrs
(14)TutorialKit
(15)PSlover
(16) TotalTutorial
(17)TutorialMan
(18)Pure-Graphics
(19)PhotoshopTalent
(20)Photoshop 911 
(21)TutorialSubmitter    
(22)Design Bump 
(23)Free Directory -
(24)CGlinks
(25)Tutorio
(26)T-tutorials
(27)Tutorial-Mix
(28)TutorialAdvisor
(29)Pixel-Groovy
(30)Tutorialing
(31)TipClique
(32)TutorialToday
(33)CapitalTutorials
(34)vunkysearch.net
(35)Tutorial-Index
(36)GFXtuts
(37)Photoshop Lady
(38)Design Float
(39)PS Tuts
(40)Tutorial Street
(41)v7n
(42)Psdtop
(43)Zeronese
ခြန္ေမာင္ပန္ http://www.decembermgmg1992.co.cc/

Friday, September 2, 2011

ကိုယ္ပိုင္ Portable Software ဖန္တီးမယ္


            ကၽြန္ေတာ္တို႔ ေန႔စဥ္အသံုးျပဳေနတဲ႔ ေဆာ့ဖ္၀ဲအမ်ားစုဟာ ကြန္ပ်ဴတာမွာ Install လုပ္ၿပီးမွ အသံုးျပဳလို႔ရပါတယ္....
အဲဒီလို ကြန္ပ်ဴတာမွာ Install မလုပ္ေဆာင္ရပဲ Double Click ကေလး ကလစ္လိုက္ရံုနဲ႔ အသံုးျပဳလို႔ရတဲ႔ ေဆာ့ဖ္၀ဲေတြကို Portable Software လို႔ေခၚဆိုၾကပါတယ္....Portable ေဆာ့ဖ္၀ဲကို အသံုးျပဳျခင္းအားျဖင့္ Usb Drive ကေလးနဲ႔ အလြယ္တစ္ကူ သယ္ေဆာင္ သြားႏုိင္တဲ႔အျပင္ ဘယ္ကြန္ပ်ဴတာမွာမဆို Install လုပ္စရာ မလိုဘဲ ခ်က္ခ်င္းအသံုးျပဳႏိုင္တဲ့အက်ဳိးေက်းဇူးရွိပါတယ္....
          ဒါေၾကာင့္ ဒီေနရာမွာ လက္ေဆာင္အျဖစ္ေပးခ်င္တာက မိမိ စိတ္ၾကိဳက္ အသံုးျပဳေနတဲ႔ ေဆာ့ဖ္၀ဲတစ္ခုဟာ Portable Version မရွိခဲ႔ဘူးဆိုရင္ေတာ့ Portable Version အျဖစ္ ေျပာင္းလဲ အသံုးျပဳႏိုင္ဖို႔အတြက္ Portable Version ျဖစ္ေအာင္ ေျပာင္းလဲေပးႏိုင္ မယ္႔ ေဆာ့ဖ္၀ဲေလးေတြပါပဲ.....။
          Portable Version အျဖစ္ေျပာင္းလဲႏိုင္မယ္႔ ေဆာ့ဖ္၀ဲႏွစ္မ်ိဳးကေတာ့ Cameyo နဲ႔ Evalaze ေဆာ့ဖ္၀ဲပဲ ျဖစ္ပါတယ္.....။ အသံုးျပဳရတာ လြယ္ကူတဲ႔အတြက္ အသံုးျပဳနည္းကို မေဖာ္ျပေပးေတာ့ပါဘူး..... စိတ္၀င္စားတယ္ ဆိုရင္ ေအာက္မွာ ေဒါင္းလုပ္ယူႏိုင္ပါတယ္။


Cameyo


G talk အေကာင့္ ဘာေၾကာင့္ေပ်ာက္

G talk အေကာင့္ ဘာေၾကာင့္ေပ်ာက္
တကယ္တမ္းေတာ့ ကၽြန္ေတာ္တို႕အေကာင့္ကို ဘယ္သူမွမခိုးပါဘူး၊ ကၽြန္ေတာ္တို႕ကိုယ္တိုင္ပဲ လုပ္ေနၾကတာပါ။ တစ္ခါတစ္ခါ မသိလိုက္ပဲပိတ္ဖို႕ေမ့က်န္ခဲ့တတ္ၾကပါတယ္။
ပထမအခ်က္က-
Gmail ပိတ္ဖို႔ေမ့ခဲ့တာ(သို႔မဟုတ္) Remember password ေပးထားတာပဲျဖစ္ျဖစ္ Browser ထဲမွ က်န္ခဲ့တက္ပါတယ္။ Gtalk ပိတ္ဖို႕ေမ့သြားရင္ေတာ့ ယူတဲ့သူကလြယ္လြယ္နဲ႕ေတာ့ ယူလို႔မရပါဘူး။
Password Viewer Software ေတြရယ္  password-recovery-for-google ေတြကိုအသံုးျပဳရပါတယ္။


ဒုတိယအခ်က္က-
Key Logger ေတြကိုအသံုးျပဳျပီး Password ကို ခိုးယူခဲ့ၾကပါတယ္။ တစ္ခ်ိဳ႕ အင္တာနက္ဆိုင္ေတြမွာေတာ့ Key logger ကို စက္ထဲ ထည့္သြင္းထားျပီး User ေတြရဲ႕ Password ေတြကို ယူတတ္ၾကပါတယ္။
အခုေနာက္ပိုင္းေခတ္စားလာတာက Phishing နည္းပညာလို႕ေခၚပါတယ္။
အဲ့ဒါကေတာ့ Gmail Home page အတုေတြ ရယ္၊ Gmail inbox ထဲ၀င္လာတဲ့ Mail မွာ Recover လုပ္မလား ဆိုတဲ့ Fade mailကို သြားဖြင့္ပီးေတာ့ User-name နဲ႕ Password ကိုထည့္ေပးလိုက္မိရင္ မိမိရဲ႕ အေကာင့္ကို တစ္ျခားသူက သိရွိသြားႏိုင္တဲ့အေၾကာင္းအရာေတြပါ။
က်ေနာ့္အေကာင့္ဘာေၾကာင့္ ေပ်ာက္ရတာလဲဆိုေတာ့- က်ေနာ္က blogspot ေရးပါတယ္ ျပိးေတာ့ Youtube က နည္းပညာနဲ႕ပတ္သတ္တဲ့သတင္းေတြကိုဖတ္ပါတယ္။ တစ္ခ်ိဳ႕ဆိုက္ေတြကို ျမန္မာျပည္ကပိတ္ထားေတာ့ US Proxy ကို ၀ယ္ျပီး ေျပာင္းသံုးပါတယ္။ ဒါမွ ေက်ာ္ၾကည့္လို႕ရမယ္ အသံုးခ်လို႕ရမွာကုိ……….
ပံုမွန္ လုပ္တဲ့အလုပ္ေတြကို ျမန္မာ Proxy နဲ႕သံုးပါတယ္ ျပီးေတာ့ ေက်ာ္ျပီးသံုးရေတာ့မယ္ဆိုရင္ US Proxy ကို သံုးမိလိုက္တယ္ အဲ့ဒီေတာ့ ခုနကအသံုးျပဳတုန္းက ျမန္မာ Ip Address နဲ႕၊ အခုခ်က္ျခင္းပဲ US IP ကို ေျပာင္းသြားတာဆိုေတာ့ဆိုေတာ့ Google Server ကမယံုတင္ကာျဖစ္ျပီး ျဖတ္လိုက္တယ္လို႕ ထင္ပါတယ္။ အဲ့ဒီေတာ့အေကာင့္ေလးက ပ်က္သြားေရာ။ အကယ္၍ Proxy ႏွစ္ခု အေျပာင္းအလဲလုပ္မယ္ဆိုရင္ အနည္းဆံုး (၂)နာရီျခားပါ ။  By Pass Program ေတြျဖစ္တဲ့ Freedom တို႕လိုမ်ိဳးသံုးလည္းအတူတူပါပဲ ဆင္ျခင္ႏိုင္ေအာင္ လို႕ပါ။
Disable ျဖစ္သြားခဲ့ရင္ေတာ့ 24 နာရီေစာင့္ၾကည့္လိုက္ပါ။ ျပီးမွ ျပန္ဖြင့္ၾကည့္ပါ။ ဘာေၾကာင့္လည္းဆိုေတာ့ တစ္ခ်ိဳ႕အေကာင့္ေတြ ျပန္မရခဲ့ပါဘူး တစ္ခ်ိဳ႕အေကာင့္ေတြေတာ့ လြယ္လြယ္နဲ႕ျပန္ရခဲ့ပါတယ္ ။
Disable ျဖစ္သြားခဲ့ရင္ အကူအညီေတာင္းခံရမည့္ေနရာကို သြားမယ့္လင့္ေလးပါ...
Gmail မွာ လံုျခံဳေရးစနစ္ အဓိက (၃)ခုရွိပါတယ္။ Gmail Password ေပ်ာက္သြားလို႔ Gmail အေကာင့္တစ္ခု ဆံုးရႈံးသြားပီလို႔မထင္လိုက္ပါနဲ႕ ျပန္ယူလို႔ရပါတယ္ ျပန္ယူနည္း (၃)နည္း ရွိပါတယ္
(၁) Gmail Recover လုပ္ထားပါ ဘာေၾကာင့္လည္းဆိုေတာ့ Password ျပန္ယူရာမွာ Recover မလုပ္ထားပါက ျပန္ယူလို႔ရမယ္မဟုတ္ပါ။ Gmail Recover လုပ္မယ္ဆိုရင္ အေကာင့္ႏွစ္ခုပိုင္ဆိုင္ထားရမွာျဖစ္ျပီး အေကာင့္အခ်င္းခ်င္း Recover ေပးထားလို႔ ရပါတယ္။
(၂)  Answer your security question
Answer your security question ကေတာ့ Password ကို အရင္ေပးထားတဲ့ Security Question အသစ္ ကို ေျပာင္းတာျဖစ္ပါတယ္။

(၃) I no longer have access to these
အေပၚကေပးထားတဲ့နည္းအတိုင္းမရပါက ေနာက္ဆံုးလုပ္ေဆာင္ရမည့္အပိုင္းျဖစ္ပါသည္။(အေသးစိတ္လြန္းပါသည္)

မွတ္ခ်က္။ ျဖစ္ႏိုင္ရင္ေတာ့အဆင့္တစ္ဆင့္လုပ္ျပီးတိုင္း (၂၄)နာရီ ျခားေပးပါ။မရတဲ့အခါမွ ေနာက္တစ္ဆင့္လုပ္ပါ.
ရွင္းလင္းခ်က္ (၁) Gmail Recover လုပ္ထားပါ
မိမိ၏ ဂ်ီေမလ္း password ေမ့သြားခဲ့လွ်င္  password recovery options ကိုအသံုးျပဳျပီး password reset လုပ္ႏိုင္ပါ သည္။ Password reset လုပ္ရာတြင္ Email Optoions / Phone Option ႏွင့္ Security Option မ်ားစသည္ထဲမွ တစ္ခုခု ကိုအသံုးျပဳပါသည္။ အသံုးအမ်ားဆံုး password recovery option ကေတာ့ Email option ကို ပဲ အသံုးျပဳပါသည္။  (ရွင္းလင္းခ်က္ကိုၾကည့္ပါ)
(Recovering Your Password လုပ္ရန္ေမလ္းအား whitecloud12909@gmail.com အျဖစ္ နမူနာထားပါမည္။)
(1)             မိမိ  Password recovery လုပ္ခ်င္ေသာဂ်ီေမလ္း ကို Sign in လုပ္ပါ။
              (ဥပမာ nyaalinkarr@gmail.com)
(2)             Gmail setting / Accounts and Imports / Change account setting မွ Change password recovery options ကို အဆင့္ဆင့္ Click ပါ။ ေအာက္ပါပံုအတိုင္းေပၚလာပါမည္။


၀ိုင္းျပထားေသာ Add or remove email address ေနရာကို Click  ႏွိပ္၍ Add an additional email address ေနရာတြင္
password recovery လုပ္ခ်င္ေသာ ဂ်ီေမလ္းအေကာင့္ကို ရုိက္ထည့္ပါ။  ျပီးလွ်င္ Save  ကိုႏွိပ္ျခင္းျဖင့္ Password Recovery လုပ္ေဆာင္ျပီးစီးျပီျဖစ္ပါသည္။ ယခုလို လုပ္ေဆာင္ထားျခင္းျဖင့္ အကယ္၍ Password ေမ့ခဲ့သည္ရွိေသာ အခက္အခဲတစ္စံုတစ္ရာမရွိပဲ မိမိ ဂ်ီေမလ္း၏ password ကိုအလြယ္တကူျပန္ယူလို႕ရပါသည္။
မိမိရဲ႕ Password (လွ်ိဳ႕၀ွက္)နံပတ္ မမွတ္မိေတာ့လွ်င္ ျပန္လည္လုပ္ေဆာင္ရန္
1.             ေအာက္ပါပံုအတိုင္း Gmail ကို Open လိုက္ပါ.။ User name မွာ Password ေမ့ေနေသာအေကာင့္ နာမည္ကိုရိုက္ပါ။
(Password ေမ့ေနေသာ ေမလ္းအား nyaalinkarr@gmail.com  အျဖစ္ နမူနာထားပါမည္။)
၀ိုင္းျပထားေသာေနရာမွာ Can’t access your account? ကို Click ပါ။
 
2.     ေအာက္တြင္ေဖာ္ျပထားေသာပံုအတိုင္း Password Recovery လုပ္ထားစဥ္က ဂ်ီေမလ္းလိပ္စာကို ကိုရိုက္ျပီး Summit ကို Click ပါ။

3.     ေအာက္ကပံုအတိုင္းေဖာ္ျပေပးထားေသာ စာေတြကို အၾကီးဆို အၾကီး၊ အေသးဆို အေသး မွန္ကန္စြာရိုက္ရပါမည္။ျပီးလွ်င္ေတာ့ Continue ကို Click ပါ။


4.     ေအာက္မွာေတြ႕ရသည့္အတိုင္း Email to ကို On ေပးပါ။ ျပီးလွ်င္ Continue ကို ဆက္လက္ Click ေပးပါ။
Email to ******@g*****.com ဆိုတာက မိမိရဲ႕ password အသစ္ကိုေျပာင္းလို႔ရမယ့္လင့္ကို Recover ေပးထားတဲ့ေမးထဲသို႔ပို႔ေပးမွာျဖစ္ပါသည္။ အဲ့ဒါကို ကလစ္ေပးပီးေတာ့ Continue ကိုႏွိပ္လုိက္တာနဲ႕ Recover mail ထဲကိုေရာက္သြားပါလိမ့္မယ္။


5.     ထိုအခါ Password recovery လုပ္ထားေသာ ဂ်ီေမလ္းအေကာင့္ထဲသို႕ ေမလ္းတစ္ေစာင့္ေရာက္ရွိလာပါလိမ့္မည္။

6.     ေရာက္ရွိလာေသာ ေမလ္းအားဖြင့္ရန္အတြက္ Recovery လုပ္ထားေသာ ဂ်ီေမလ္းကို  Sign in လုပ္ပါ။
ေမလ္းကိုဖြင့္၍ ပံုတြင္ျပထားသည့္ Link ကုိႏွိပ္ပါ။


7.     Link ကိုႏွိပ္လွ်င္  ေအာက္တြင္ျပထားသည့္ပံုအတိုင္း New Password ႏွင့္  Re-enter password တြင္ Password အသစ္ကိုရိုက္ထည့္ျပီးေနာက္ Reset Password ကို ႏွိပ္ေပးပါ။

ဒါဆိုရင္ Password ေမ့သြားေသာအေကာင့္ ကို ယခုယူထားေသာ Password အသစ္ျဖင့္  Sign in လုပ္၍ ျပန္လည္အသံုးျပဳႏိုင္ပါျပီ။

xxxxxxxxxxxxxxxxxxxxxxxxx
ရွင္းလင္းခ်က္ (၂) I no longer have access to these
I no longer have access to these ဆိုတာေလးကို ကလစ္ေလးေပးပီးေတာ့ Conitinue ကိုႏွိပ္လိုက္ပါ ။ ေအာက္မွာ ျပထားတဲ့ Box ေလးတစ္ခုက်လာပါလိမ့္မည္

ပထမဆံုးက မိမိမွာအေကာင့္အပိုတစ္ခု(သို႕) မိမိသူငယ္ခ်င္းရဲ႕ဂ်ီေမးလိပ္စာတစ္ခုခုကို ခနငွားပီးေတာ့ Contact informationand problem details  ဆိုတဲ့ ေခါင္းစဥ္ေအာက္မွာရွိတဲ့-
An email adress we can use to contact you* ဆိုတဲ႕အကြက္ေလးထဲမွာ ထည့္လိုက္ပါ။ ဘာျဖစ္လို႕လဲဆိုေတာ့ အဲ့ဒီ ဂ်ီေမးလိပ္စာအတိုင္း  Password ေျပာင္းမယ့္ လင့္ကိုပို႔ေပးမွာျဖစ္ပါသည္။ ျပီးရင္ ေအာက္နားေလးက I am unable to reset my password ဆိုတာေလးကို Click ေပးပါ။
Product information  ေအာက္နားက Do you use Gmail with this account?* ဆိုတဲ႕ေနရာမွာ Yes ကိုေရႊးေပးလိုက္ပါ ေရြးေပးလိုက္ရင္ ေအာက္နားမွာ အကြက္ေလးေတြထပ္ထြက္လာပါလိမ့္မယ္။ အကြက္ေလးထဲမွာ မိမိေပ်ာက္သြားတဲ့
ဂ်ီေမးလိပ္စာကိုထည့္လိုက္ပါ ။ျပီးလွ်င္ ေအာက္နားမွာ Do you have a verification code? ဆိုတာေလးရွိပါတယ္။ အဲ့ဒါက အေကာင့္လုပ္ကတည္းက recover mail ေပးျပီးေတာ့ လုပ္ထားမွရပါတယ္ အဲ့ဒီကုဒ္ေလးကို သိရင္ေတာ့ ထည့္ေပးလိုက္ပါ။ မသိရင္လည္း ထားခဲ့လို႔ရပါတယ္။ ဆက္ျပီး Email adresses of up to five frequently emailed contacts: ဆိုတဲ႕ေနရာမွာ မိမိအေကာင့္ လုပ္တုန္းက အရင္ဆံုး Add တဲ့သူ (သို႕)အရင္ဆံုး ေမးလ္ပို႔ တဲ့သူတစ္ေယာက္ ရဲ႕ အေကာင့္ကို ထည့္ေပးရမွာျဖစ္ပါတယ္။ (ဒါကလည္းမလြယ္လွပါဘူး. မွတ္မိခ်င္မွမွတ္မိပါလိမ့္မယ္)
Other account information
Account creation date* အေကာင့္ လုပ္ခဲ့တဲ႕ လနဲ႕ႏွစ္ကို ထည့္ေပးရပါမယ္။ Last successful login date ဆိုတာက ေနာက္ဆံုး ဖြင့္ခဲ့တဲ့ေန႔ကို ထည့္ေပးရပါမယ္။  အတိအက်ထည့္ေပးရပါမယ္။ မသိရင္ေတာ့ထားခဲ့လိုက္ပါ။ ျပီးရင္ password အေဟာင္းကို last password you remember* အဲ့အကြက္ေလးထဲမွာထည့္ေပးလိုက္ပါ။ Submit ကို ႏွိပ္လိုက္ပါ။ နည္းနည္းေလးၾကာရင္ေတာ့ ကၽြန္ေတာ္ ထိပ္ဆံုးမွာ(An email adress we can use to contact you* ) ထည့္ထားတဲ့ဂ်ီေမးလ္လိပ္စာထဲကို Password အသစ္ေျပာင္းမယ္ လင့္ေလးေရာက္လာပါလိမ့္မယ္ အဲ့ဒီမွာေျပာင္းလိုက္ရင္ အဆင္ေျပသြားပါျပီ။

ဒီနည္းေလးက ကိုယ့္အေကာင့္ အခိုးခံရသူေတြအတြက္ လုပ္ရတာအဆင္ေျပပါတယ္ ဘာလို႔လည္းဆိုေတာ့ ကိုယ္ပဲသိႏိုင္တဲ့အခ်က္အလက္ေတြပဲျဖစ္လို႔ပါ။ဒါေပမဲ့လည္း ကၽြန္ေတာ္တို႕ ကိုယ္တိုင္မွတ္သားထားမိဖို႕လိုပါလိမ့္မယ္။


ေစတနာမ်ားစြာျဖင့္
အလကၤာည

Friday, July 15, 2011

G talk မွာ မိမိ အမည္မက်န္ေအာင္ လုပ္တဲ့နည္း


...ကြ်န္ေတာ္တို. Gtalk သုံးတဲ့အခါမွာေတာ္မ်ားမ်ားကေတာ့အင္တာနက္ဆိုင္မွာသုံးတာမ်ားပါတယ္ ။   အခုတင္္ၿပတဲ့့နည္းကေတာ့အင္တာနက္ဆိုင္မွာမိမိရဲ.Gmail Addressေတြမက်န္    ခဲ့ေစေအာင္သုံးတဲ့နည္းေလးပါ။ဒီလိုပါ။မိမိGtalk မ၀င္ခင္  မိမိရဲ.ေရွကဘယ္သူေတြ Gtalk၀င္သြားလဲ၊   သူတို.ရဲ. Gmail Addressေတြက ဘာနာမည္လဲဆိုတာသိခ်င္ၾကပါလိမ့္မယ္။      ေနာက္တခုက မိမိ Gtalk ၀င္ခဲ့ရင္လဲမိမိ GmailAddressကိုသူမ်ား မသိေအာင္ ဘယ္လိုဖ်က္မလဲဆိုတာတင္ၿပေပးခ်င္ပါတယ္။သူမ်ားသိေတာ့ကို ကို invite လုပ္မွာေပါ့။အဒီေတာ့  စက္ထဲမွာ မိမိ Gmail Addressမက်န္ခဲ့ေစရန္ရည္ရြယ္ေရးသြားပါတယ္။
စလုပ္လိုက္ရေအာင္။

၁။ အရင္ဦးဆံုး Start ထဲက Run ကိုနွိပ္ပါ။
    (သို.မဟုတ္)Window+R ကိုတြဲဖိပါ။

၂။ Run Box က်လာပါက Regedit ကိုရုိက္ထည့္ေပးပါ။
     Box က်လာပါလိမ့္မည္။

၃။ ထို Boxထဲတြင္ Folder ၅ခုေတြ.ပါလိမ့္မည္။
     ထို Folder ၅ခုမွ ဒုတိယေၿမာက္ HKEY_CURRENT_USER ေဘးရိွ + ကိုႏွိပ္ပါ။
     List က်လာပါလိမ့္မည္။

၄။ Software ရွာပါ။ေတြ.ပါကSoftware ေဘးရွိ +ကိုဆက္ႏွိပ္ပါ။
     List က်လာပါလိမ့္မည္။

၅။ Google ကိုရွာပါ။ေတြ.ပါက Google ေဘးရွိ + ကိုဆက္ႏွိပ္ပါ။
     List က်လာပါလိမ့္မည္။

၆။ Google Talk ကိုရွာပါ။
     ေတြ.ပါက Google Talk ေဘးရွိ +ကိုႏွိပ္ပါ။
     List က်လာပါလိမ့္မည္။

၇။  Account ႏွိပ္ပါ။
     G-mail Address မ်ားကိုေတြ.ရပါလိမ့္မည္။
     အကယ္လို.မိမိ G-talk ၀င္ခဲ့ တယ္ဆိုရင္ေတာ့မိမိG-mail Addressနာမည္
     ေပၚေနပါလိမ့္မည္။
     ဖ်က္လိုပါက မိိမိနာမည္ ေပၚတြင္ Right ကလစ္နွိပ္၊Delete ကိုႏွိပ္လိုက္ပါ။
     Name/Type/Data တို.ေအာက္က်န္ခဲ့ပါက Name ေအာက္ရွိ ab ေပၚတြင္ Right
     ကလစ္နွိပ္၊Delete ကိုႏွိပ္ေပးပါ။


ေနာက္တစ္နည္း ရွိပါတယ္ေသးတယ္.

၁။ G talk မွာ sing out ထြက္ၿပီးတာနဲ႕... log in address ကို ဖ်က္လိုက္ပါ.... ၿပီးရင္ G talk box ကိုပိတ္လို္က္ပါ....
၂။ ပိတ္ၿပီးတာနဲ႕ Desktop screen ရဲ႕ညာဘက္ေထာင့္မွာ G-talk icon ပံုေလးေပၚကို right click နွိပ္ၿပီး exit နဲ႕ ထြက္လိုက္ပါ....
ဒါဆိုရင္ၿပီးပါၿပီ။


မိမိ Block ထားေသာသူအား သူ႔ Gtalk တြင္ မျမင္ရေအာင္ Delete လုပ္နည္း

Gtalk ကေန မိမိႏွင့္ အဆင္မေျပသူကို မိမိဘက္က Block သို႔ Remove လုပ္လိုုက္ရင္ မိမိဘက္ကသာ သူ႔ကိုမျမင္ရေတာ့ေပမယ့္ မိမိ Block သို႔ Remove လုပ္လိုုက္တဲ့သူရဲ႔ Gtalk မွာေတာ့ မိမိနာမည္ရွိေနေသးတဲ့အတြက္ သူ႔ဘက္ Chat လို႔ရပါေသးတယ္။ ကိုယ့္ဘက္က Block လိုက္တယ္ဆိုေပမယ့္ သူ႔ရဲ႔ Gtalk List မွာ ရွိေနဦးမွာပါ.။ အဲ့ဒီလိုမ်ိဳးေတြ မျဖစ္ရေအာင္ အၿပီးအပိုင္ သံေယာဇဥ္ျဖတ္မယ္ဆိုရင္ေတာ့ ဒီနည္းေလးအတိုင္းျပဳလုပ္လို႔ရပါတယ္။

ပထမဦးဆံုး Gmail ကို ဖြင့္ပါး။ ၿပီးရင္ Contacts ကုိ ရွာၿပီး Click ႏွိပ္လိုက္ပါ။ အဲ့ဒီအခါ Contacts Box က်လာရင္ မိမိ Delete လုပ္ခ်င္ေသာ Account ကို ေရြးၿပီး အမွန္ျခစ္ကာ Delete contact ကုိ click ႏွိပ္လိုက္ပါ။ တကယ္ဖ်က္မွာလားလို႔ေမးတဲ့ Box က်လာရင္ OK ကို ႏွိပ္လိုက္ပါ။ ဒါဆို မိမိမဆက္သြယ္လိုသူကို အၿပီးအပိုင္ သံေယာဇဥ္ျဖတ္လိုက္လို႔ရသြားပါၿပီ။ သူ႔ရဲ႔ Gtalk မွာလည္း မိမိအမည္ မရွိေတာ့သလို သူ႔ Gtalk မွာလည္း ကိုယ့္အမည္ က်န္ရွိေတာ့မည္ မဟုတ္ေတာ့ပါ။
http://multiplygroups.multiply.com/journal/item/634  မွာလည္း သြားေရာက္ ဖတ္ယူလုိ႔ရပါတယ္။

Monday, June 27, 2011

အီးေမလ္းအား ၾကား၀င္ေဖာက္ဖတ္ႏုိင္ေသာ ေနရာမ်ား

Encrypt-your-Gmail-Email


ယေန႔ေခတ္အတြက္ အင္တာနက္ဆုိတာ တစ္ေယာက္ကုိတစ္ေယာက္ ဆက္သြယ္မႈ႕အပုိင္းမွာ အဓိကက်ေသာ အပုိင္း၊အခန္းက႑ကေနပါ၀င္ေနပါတယ္။ ဒါေပမဲ႔ တုိးတက္လာတဲ႔ နည္းပညာအေလွ်ာက္ အင္တာနက္ နဲ႔ အီးေမးလ္အသုံးၿပဳသူတုိင္း မိမိတုိ႔အသုံးၿပဳေသာ နည္းပညာ အားသာခ်က္ အားနည္းခ်က္ေတြကုိ သိထားသင့္ေပသည္။ အီးေမလ္း လိပ္စာေလးတစ္ခုရုိက္ထည့္ၿပီးပုိ႔လုိက္တယ္.. ဒါေပမဲ႔ အဲ႔လုိပုိ႔လုိက္တဲ႔ ေမးလ္ဟာ လူသန္းေပါင္းမ်ားစြာ သုံးေနေသာ အင္တာနက္ေပၚမွာၿဖတ္သန္းသြားလာေနၾကတယ္။ ဒီလုိေနရာမွာ ၾကားခံ Gateway, Server, Backbone, Segment ေတြကုိၿဖတ္သြားရတယ္။ ဒီအတြက္ မိမိတုိ႔သုံးေနတဲ႔ ေမးလ္ေတြကုိ ၾကားခံေနရာကေန ၀င္ေရာက္ ေဖာက္ၾကည့္လုိ႔ရတယ္ဆုိတာကုိ သိထားသင့္တယ္။


Internet Service Provider (ISP)
ISP ဆုိတာ မိမိတုိ႔သုံးေနတဲ႔ Network Traffic ေတြအားလုံးကုိ အလြယ္တကြယ္ေစာင့္ ဖမ္းႏုိင္တဲ႔ေနရာပါ။ ကၽြန္ေတာ္တုိ႔သုံးေန network packet ေတြဟာ ISP မွာေတာ့ Feed တစ္ခုထားခဲ႔ရတာပဲ။ ဒီအတြက္ မိမိတုိ႔ရဲ႕ ေမးလ္အားလုံးကုိ ISP ဟာ လုိအပ္ရင္လုိအပ္သလုိ ၀င္ေရာက္ ၾကည့္လုိ႔ရတယ္။

Email Provider
မိမိအသုံးၿပဳေနေသာ ေမးေတြအားလုံးကုိ အသုံးၿပဳေနေသာ ေမးလ္ provider ေတြကေန ၀င္ၾကည့္လုိ႔ရတယ္။ ဥပမာ - Gmail သုံးတယ္ဆုိရင္.. Gmail ရဲ႕ Authorized person ေတြက ၾကည့္လုိ႕ရတယ္။

Corporate Environment
တစ္ခ်ဳိ႕လုပ္ငန္းကုမၸဏီ ေတြက မိမိတုိ႔ရဲ႕ လုပ္ငန္းအတြင္း Data Document ေတြ အမွားအယြင္းနဲ႔ ၀န္းထမ္းေတြကုိေစာင့္ၾကည့္ရန္ packet sniffer ေတြကုိ Internal Network တစ္ခုလုံအတြက္ ထားထားၾကတယ္။

Hotel/Conference Center/Internet Café
Hotel/Conference Center ေတြကေန user ေတြရဲ႕ ေမးလ္ေတြကုိ intercept လုပ္လုိ႔ရတယ္။ ေဟာ္တယ္ ေတြနဲ႔ Conference Center ေတြမွာ ၄င္းတုိ႔ရဲ႕ User ေတြကုိ သတ္မွတ္ခ်က္အတုိင္း အသုံးၿပဳရေအာင္ Net ကုိထိန္းခ်ဴပ္ထားတယ္၊ ထုိ႔အတူ Cyber Cafe ေတြလည္းအဲ႔အတုိင္းပဲ... ဒီေနရာမွာ တစ္ခုရွိတာက ၿမန္မာၿပည္က Cyber Cafe ေတြ ေတာ္ေတာ္မ်ားမ်ားက ၄င္းတုိ႔ရဲ႕ Server / Gateway Router ေတြကုိ တိတိက်က် လုံၿခဳံမႈ႕မေပးထားရင္ အၿပင္လူက ၄င္း server / Router ကုိ၀င္ေဖာက္ၿပီး Network တစ္ခုလုံးရဲ႕ Packet ေတြကုိ Sniffing လုပ္ကာ အီးလ္ေမးေဖာက္ႏုိ္င္တယ္။

Housing Provided Connectivity
condominium and apartment complexes အခ်ဳိ႕ေတြမွာ ၄င္းတုိ႔၏ အိမ္ရွင္၊ အိမ္ငွားေတြအတြက္ Built-in High Speed Internet ေတြကုိ ေပးသုံးၾကတယ္။ ဒါက Hotel/Conference Center/Internet Café ေတြတူပါတယ္။ အကယ္၍ ၄င္း Network မွာ Admin တစ္ေယာက္က ညံ့ဖ်င္းတာပဲၿဖစ္ေစ၊ Admin က ၾကား၀င္ေဖာက္တာပဲၿဖစ္ေစ ၀င္ေရာက္ႏုိင္တယ္။

College Environment
College ေတြမွာသုံးတာကုိ cable modems and other broadband technologies ‘shared local loop’ network model လုိ႔ေခၚၿပီးေတာ့ ၄င္းေနရာေတြမွာလည္း ၾကား၀င္ေဖာက္လုိ႔ရတယ္။ ဒါကလည္း corporate networks interception နဲ႔တူတယ္/

Local Loop Interceptionအကယ္၍ မိမိရဲ႕ အိမ္နား၀န္းက်င္မွာ သုံးေနတဲ႔ လူတစ္ေယာက္ရဲ႕ Network နဲ႔ Mail ကုိ interception လုပ္မယ္ဆုိရင္ ပုံမွန္အားၿဖင့္မလြယ္ႏုိင္ေပမဲ႔ ၄င္း system ကုိ၀င္ေရာက္ဖုိ႔ special hardware အနည္းငယ္ေတာ့လုိတယ္။ ဒီလုိေနရာေတြမွာလည္း ၀င္ေရာက္ႏုိင္တယ္။

MAN environmentယခုအခ်ိန္မွာေတာ့ MAN ေတြကုိ ၿပည္တြင္းအစုိးရအဖြဲ႕အစည္းနဲ႔ ေတြေလာက္ပဲ က်ယ္က်ယ္ၿပန္႔ၿပန္႔သုံးတာမ်ားတယ္။ ဒီလုိေနရာမွာလည္း မိတ္ေဆြတုိ႔သုံးေနတဲ႔ network ကုိ sniffing လုပ္လုိ႔ရတယ္။

Wireless Network Access Point
Wireless Network ဆုိရင္ မ်ားေသာအား Wi-Fi ကုိပဲေၿပးၿမင္လိမ့္မယ္.. ဟုတ္ပါတယ္. ဒီလုိ Wi-Fi Wireless AP ေတြကလည္း Interception လုပ္လုိ႔ရတယ္။ ၄င္း Wireless တြင္၊ Wi-Fi, WiMAX, Bluetooth, GPRS, HSDPA စည္တုိ႔လည္းပါ၀ယ္တယ္။

တကယ္တမ္းေၿပာရမယ္ဆုိရင္ ဒါေတြတင္မကဘူး အမ်ားၾကီးရွိေသးတယ္။ ဒါေတြက အဓိက ေနရာေတြပဲ။

ဒီေတာ့ မိမိတုိ႔ရဲ႕ ေမးလ္ေတြကုိ ဘယ္သူမွ မ၀င္ဖတ္ႏုိင္ေအာင္ လုပ္ေဆာင္တဲ႔ နည္းမရွိဘူး။ ဒါေပမဲ႔ တစ္ခုတည္းေသာ နည္းလမ္းကေတာ့ မိမိပု႔ိလုိက္ေသာ messages ေတြကုိ Encrypt လုပ္ၿပီးပုိ႔ကာ ၾကာ၀င္ေဖာက္ၾကည့္လုိ႔မရေအာင္ လုပ္ေဆာင္ၿခင္းသာ အေကာင္းဆုံးနည္းလမ္းၿဖစ္တယ္။
အေကာင္းဆုံးနည္းလမ္းၿဖစ္တယ္။Encrypt လုပ္ဖို႔အတြက္ http://www.instructables.com/id/Encrypt-your-Gmail-Emailဒီလင္႔ေလးမွာသြားေရာက္ေလ႔လာၾကည္႔လိုက္ပါ။ၿပည္စံုစြာရွင္းၿပထားေပးပါတယ္။
From Forever Friend

Saturday, June 25, 2011

Useful Websites Sharing

This summary is not available. Please click here to view the post.

Monday, June 20, 2011

သင္မၾကားဖူး(ေလာက္)ေသာ Browser ၁၀ ခု

Firefox. Internet Explorer. Chrome. Safari. Opera. We’ve pretty much all heard of them by now. They’ve been fighting for market share for the past few years (Internet Explorer has been fighting for it for a lot longer than that), and it’s unlikely any of them will ever come out the absolute winner. They try to be all things to all people. And that’s great.

Except…

What if you’re looking for a browser that does just the things you want to do online? What if you’re sick of all the browser-war hubub and want something that’s truly unique and different (and, maybe, works better than the mainstream options)? What then?

Posted Image


Well, there’s good news. There are more than a dozen excellent alternative browsers out there if you’re looking for something distinctive. Below are ten such web browsers, along with why you might want to consider using them.


1. Stainless
Posted Image

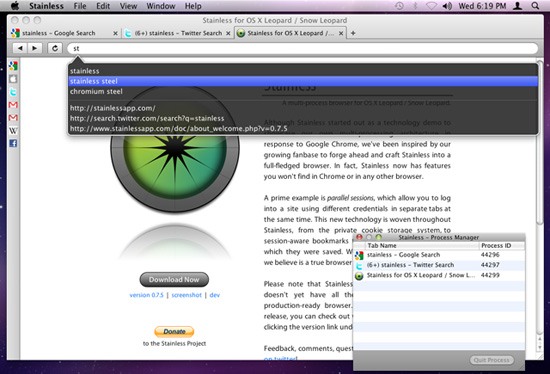
Stainless is a browser created in response to Google Chrome. It utilizes multi-processing architecture like Chrome (which, at the time of inception, wasn’t available for OS X), but also has some excellent features not found in other browsers. One of the most interesting features is the ability to log into one website using two different accounts in separate tabs.

Why you should consider it: The ability to log into a site with different credentials in different tabs makes this an excellent option for many. It’s especially useful if you have, say, work-related Gmail accounts and personal Gmail accounts.

Current release version: 0.7.5

Operating systems supported: OS X Leopard and Snow Leopard.


2. Maxthon
Posted Image

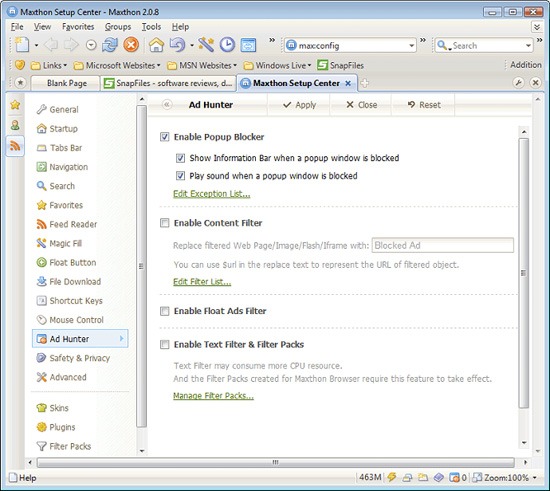
Maxthon is a highly configurable browser that places an emphasis on security. It has a built-in Ad Hunter that blocks most ads, as well as security features to prevent spyware, malware, and viruses. It lets you fully customize your browsing experience (you can choose between using menus, hot keys, word aliases, toolbars, or mouse gestures, plus there are more than 1,400 plug-ins to add functionality). It has filters available to block irritating or offensive content.

Other Maxthon features include a built-in screen capture tool, URL aliases for faster surfing, a built-in feed reader, an online favorites service, advanced proxy rules, and an anti-freeze feature.

Why you should consider it: If you want a customizable browser, Maxthon might be what you’re looking for; it’s built specifically for power users. Between plugins, skins, filter packs, and other customizable features, it truly lets you personalize your browsing experience. For parents concerned about their children’s’ activities online, the filters for blocking content can be reassuring.

Current release version: 2.5.11 (the Classic Version is also available: 1.6.5)

Operating systems supported: Windows


3. Sleipnir
Posted Image

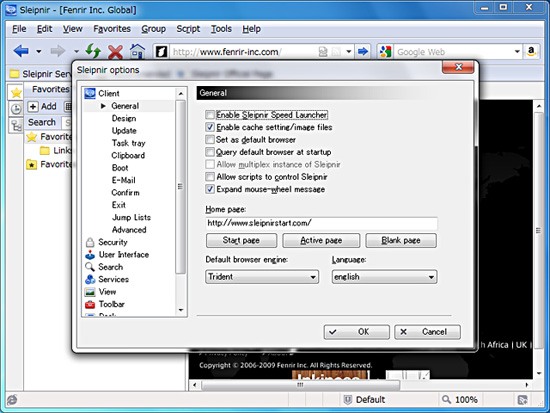
Sleipnir is very popular in Japan with a majority share in the country. It’s a profoundly customizable browser that maintains speed and performance despite customizations. There are skins and plugins available for it, letting you change the design and settings of the browser to suit your needs. And as all good browsers should, it stresses on security and usability, and allows for tabbed browsing.

Why you should consider it: Sleipnir is an option if you want a highly customizable browsing experience.

Current release version: 2.9.2

Operating systems supported: Windows 98 and newer


4. Swiftfox
Posted Image

Swiftfox is an optimized build of Firefox that’s faster and more cutting edge than the regular Firefox distribution. It works with Firefox plugins, making it remarkably extensible. The overall user interface is similar to Firefox, but is a bit more minimalist and clutter-free. Most other features are in line with what Firefox has to offer.

Why you should consider it: If you love Firefox but want something faster and lighter, then Swiftfox is your best bet.

Current release version: 3.5.6

Operating systems supported: Linux


5. Lunascape
Posted Image

Lunascape is the world’s first and only triple engine browser. That’s right: it’s a hybrid browser that runs on Gecko, Trident, and WebKit. It supports plugins and add-ons from Firefox, Internet Explorer, as well as their own plugin platform. It’s touted to be faster and lighter than many other browser options.

Why you should consider it: If you find yourself constantly switching back and forth between browsers (either for cross-browser testing of web designs or because of add-ons available only to Firefox or Internet Explorer), Lunascape is a perfect fit for you.

Current release version: 6.0.1

Operating systems supported: Windows


6. Konqueror
Posted Image

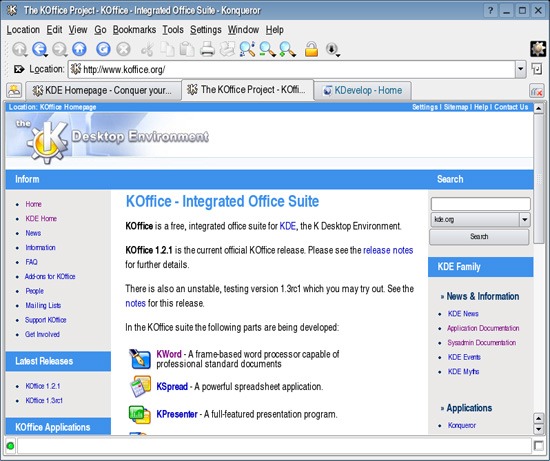
Konqueror combines web browsing, local and remote file management, and a universal viewing app that lets you view documents without having to launch other programs. It’s open source and HTML 4.01 compliant. It embraces Netscape plugins (like those for Flash or RealVideo). Konqueror also has a built-in FTP and WebDAV support.

Why you should consider it: If you’re a Linux user who wants a browser that can multitask, then Konqueror is definitely something to look into. It’s especially useful for those who want to be able to manage files right from within their browser.

Operating systems supported: Linux


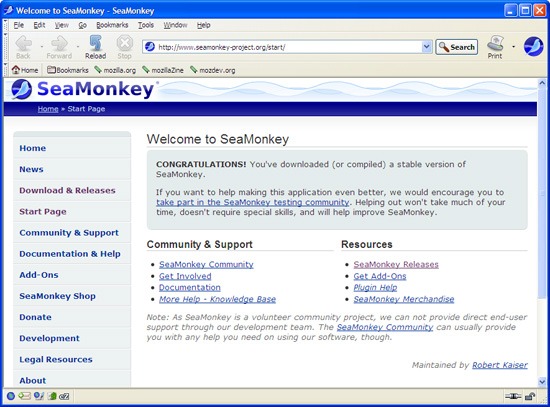
7. SeaMonkey
Posted Image

SeaMonkey is developed by Mozilla and is an "all-in-one" internet suite of apps. While the browser within SeaMonkey is pretty standard (and not unlike Firefox), what sets it apart is that it has integrated email, newsgroups, an HTML editor, IRC Chat, and web development tools. The mail feature offers tabbed reading and supports tagging and alternate views for better email finding and reading. The HTML editor renders CSS and gives you dynamic image and table resizing. For web developers, you can take advantage of the JavaScript debugger and a DOM inspector.

Why you should consider it: For developers and designers, SeaMonkey has a plethora of useful built-in features. It’s also a great option for people who like to run the bare minimum number of apps.

Current release version: 2.0.1

Operating systems supported: Windows 2000 and newer, Mac OS X 10.4 and newer, and Linux.


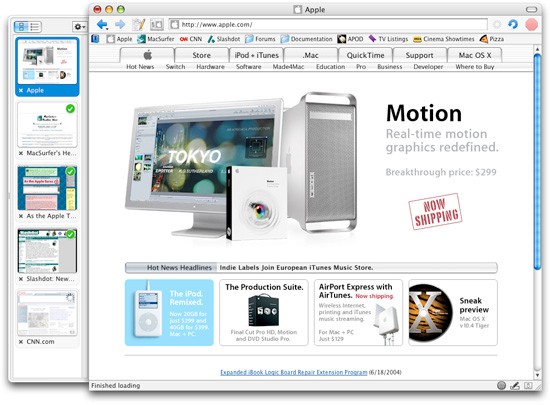
8. OmniWeb
Posted Image

OmniWeb is a WebKit browser created by the same people who created OmniGraffle and OmniOutliner. It aims to be fun and easy to use (like other Omni products) and shares a similar user interface. It has all the standard browser features we’ve come to expect (including tabbed browsing, bookmarks, and ad blocking), but also includes Workspaces, which lets you save browsing sessions to open later and includes an auto-save option and a built-in RSS reader.

Why you should consider it: For Mac users who want a browser that’s efficient and easy to use, OmniWeb might be just what you’re looking for. It’s appropriate for power users too, and the Workspaces feature is especially handy.

Current release version: 5.0.1

Operating systems supported: Mac OS X 10.4.8 or newer


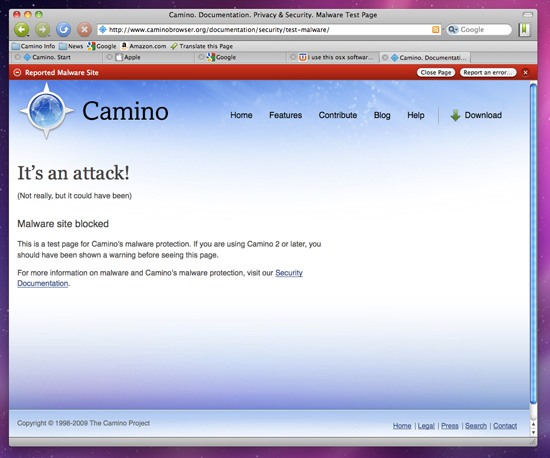
9. Camino
Posted Image

Think of Camino as a Firefox build specifically for Macs, built on the Gecko 1.9 rendering engine. It includes phishing and malware protection, tabs (including a tab overview function that lets you see all your open tabs at once), "annoyance blocking" (which blocks ads, pop-ups, and Flash animations), Keychain support (to save your browsing credentials), and download notifications. It also includes AppleScript support, feed detection, session saving, recently closed tabs, and full keyboard access.

Why you should consider it: Camino is a great browser for Mac users who like Firefox but want something built specifically for the Mac.

Current release version: 2.0

Operating systems supported: Mac OS X 10.4 or newer


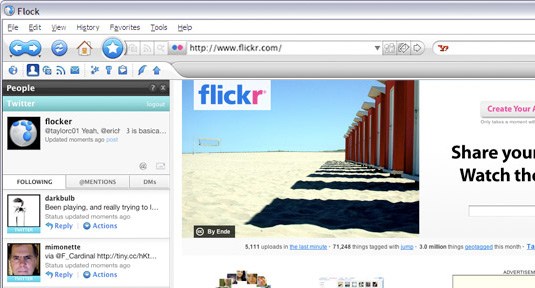
10. Flock
Posted Image

Flock is probably better known than many of the other browsers above, especially if you’re a social media addict. Flock was created specifically to make managing your social media activities easier from within your browser.

Flock focuses on staying connected through social media by making sharing and publishing things easier. It integrates directly with Facebook, Gmail, Digg, YouTube, MySpace, Flickr, Twitter, WordPress, Blogger, Delicious, Bebo, TypePad, Picasa, and more. Special features include a People sidebar, a Media bar (to browse photos and videos from your favorite sites), a built-in feed reader, a photo uploader, a blog editor, and more. There are also extensions and custom themes available for download.

Why you should consider it: Flock is a great choice for social media power users who want to be able to connect with all their social media accounts from one place.

Current release version: 2.5

Operating systems supported: Windows, Linux, Mac OS X
from (PadonMar)

Friday, June 17, 2011

Online Security အတြက္ အခ်က္(၁၀)ခ်က္


လြန္ခဲ႕တဲ့ ႏွစ္အနည္းငယ္ အတြင္း ကမာၻတစ္၀ွမ္းလံုးမွာ အင္တာနက္ သံုးစြဲမႈႏႈန္း ရုတ္တရက္ ျမင္႕တက္လာတဲ့ နည္းတူပဲ အြန္လိုင္းကေန တဆင္႕ အခ်က္အလက္ ခိုးယူမႈ၊ ဘဏ္အေကာင္႕ နံပါတ္ခုိးယူ သံုးစြဲမႈ၊ စတဲ့ ဆိုက္ဘာ
ဒုစရုိက္မႈေတြလည္း တေျပးညီ ျမင့္တက္ လာခဲ႕ပါတယ္။
ဒီေန႕ေခတ္ရဲ႕ အင္တာနက္သံုးစြဲသူအားလံုးရဲ႕ 91% ဟာအြန္လိုင္း အႏၲရာယ္ေတြရဲ႕
ျခိမ္းေျခာက္ခံေနရၿပီး ဘယ္ကုိကာကြယ္ရမလဲဆိုတာလဲ မသိၾကရပါဘူး။ ဒါေၾကာင့္
ကိုယ့္ရဲ႕ Online Security အတြက္ လံုျခံဳ စိတ္ခ်ရေအာင္ ကာကြယ္ေပးႏိုင္တဲ့
အခ်က္ (၁၀) ခ်က္ကို ေအာက္မွာ ေဖာ္ျပေပးလိုက္ ပါတယ္။
နံပါတ္ (၁)
သင္႕ကြန္ပ်ဴတာမွာ ေကာင္းမြန္တဲ႕ Antivirus နဲ႕ Anti-spyware ေတြ Install လုပ္ထားဖို႕လိုအပ္ၿပီး အျမဲ Up-to-date ျဖစ္ေနေအာင္ ျပဳလုပ္ထားသင္႕ပါတယ္။
Recommended ေပးထားတဲ႕ Anti-spyware ေတြကို ဒီလင္႕ခ္မွာ ၾကည္႕ရႈႏိုင္ပါတယ္။
နံပါတ္(၂)
ကိုယ္ကိုယ္တိုင္ သိတဲ႕၊ သံုးေနက်ျဖစ္တဲ႕၊ ယံုၾကည္ရတဲ႕ website ေတြကိုသာ ၀င္ေရာက္ၾကည္႕ရႈသင္႕ပါတယ္။ တကယ္လို႕ သင္မသိတဲ႕ တစ္ခါမွ မသံုးဘူးတဲ႕ website
တစ္ခုကို ၀င္ၾကည္႕မယ္ဆိုရင္ေတာ႕ ေၾကာ္ျငာ(Ad) ေတြ၊ ေခါင္းစည္း(Banner)
ေတြကို Click မႏွိပ္မိဖို႕ သတိထားပါ။
နံပါတ္(၃)
Email ကတဆင္႕ ေရာက္ရွိလာတဲ႕ Attachment File ေတြကို Download မယူခင္ေရာ ယူၿပီး မ Run ခင္မွာပါ Virus Scan စစ္ေဆးပါ။
နံပါတ္(၄)
သင္႕ရဲ႕ Operating System နဲ႕ Browser တို႕ကို ပံုမွန္ Update ျပဳလုပ္ေပးပါ။ ပိုေကာင္းတဲ႕ လံုျခံဳေရးအတြက္ဆိုရင္ အင္တာနက္သံုးစြဲတဲ႕အခါ
ကိုယ္သံုးတဲ႕ Browser ရဲ႕ ေနာက္ဆံုးထုတ္ Version ကိုအသံုးျပဳၿပီး
သံုးစြဲသင္႕ပါတယ္။
နံပါတ္(၅)
သင္႕ရဲ႕ Password ( Email, Bank Account ) ေတြကို ဘယ္သူ တစ္ဦးတစ္ေယာက္နဲ႕မွ ဘယ္လို အေၾကာင္းျပခ်က္ အတြက္ျဖစ္ေစ Share
မသံုးမိပါေစနဲ႕။ Password ေရြးခ်ယ္တဲ႕အခါမွာလဲ Strong ျဖစ္ေအာင္ေရြးပါ။
Password တစ္ခုေရြးတဲ႕အခါ
1. Capital Letters
2. Small Letters
3. Symbols
4. Numbers
အထက္ပါ (၄) ခုအနက္ (၃) ခု ပါ၀င္သင္႕ပါတယ္။ Password ကိုလဲ (၃) လတစ္ႀကိမ္ေလာက္ အသစ္ေျပာင္းသင္႕ပါတယ္။ ၿပီးေတာ႕ အလြယ္တကူ ခန္႕မွန္းႏိုင္တဲ႕ Password မ်ိဳးေတြ မေပးသင္႕ပါဘူး။ ဥပမာေျပာရရင္- ဖုန္းနံပါတ္၊
ခ်စ္သူရည္းစားအမည္၊ စသည္ေပါ႕။
နံပါတ္(၆)
Website တစ္ခု ဖြင္႕မယ္ဆိုရင္ Browser Address Bar ေပၚမွာ URL ကုိ အျပည္႕အစံုရိုက္ပါ။ ဥပမာ သင္က Gmail ကို၀င္မယ္ဆိုရင္ http://mail.google.com လို႕ http:// ပါ ပါေအာင္ ရိုက္ပါ။
နံပါတ္(၇)
Login Page တစ္ခုမွာ Password ရိုက္ထည္႕ေတာ႕မယ္ဆိုရင္ အေပၚက Address မွာ http အစား https လို႕ ေျပာင္းေနလား ေသခ်ာေအာင္ၾကည္႕ပါ။ Https ဟာ SSL ( Secure Sockets Layer) ျဖစ္ၿပီး Http ထက္ ပိုၿပီး Security ေကာင္းပါတယ္။
နံပါတ္(၈)
Phishing Emails ( ေမးလ္အတုမ်ား ) ကိုသတိထားပါ။ သင္႕ထံေရာက္လာတဲ႕ ေမးလ္ေတြထဲက ဥပမာ- ဒီလင္႕ခ္ကို ႏွိပ္ၿပီး Account
Settings ကို ေျပာင္းရန္ အစရွိသည္အားျဖင္႕ေဖာ္ျပထားတဲ႕ ေမးလ္ေတြက Link
ေတြကိုမႏွိပ္မိပါေစနဲ႕။ သင္႕ကို Spoofed Pages ( Page အတု )ေတြဆီကို ေခၚသြားၿပီး Login ၀င္ခိုင္းႏိုင္လို႕ပါ။ Phishing နဲ႕ Spoofed အေၾကာင္း ေနာက္ပိုင္းမွာ အက်ယ္ရွင္းျပပါ႕မယ္။
နံပါတ္(၉)
အသံုးျပဳၿပီးတဲ႕အခါ အျမဲတမ္း Logout ထြက္ပါ။ Logout ထြက္ရံုတင္မက Browser ရဲ႕ Cache နဲ႕ History ေတြကို ရွင္းေပးပါ။ ( Mozilla Firefox မွာဆိုရင္ Tools ထဲက Clear Private Data ကိုႏွိပ္ၿပီး အမွန္အားလံုးျခစ္၊ Clear လုပ္ေပးပါ )
နံပါတ္(၁၀)
Internet Cafe ေတြက Public Computers ေတြမွာ Bank အေကာင္႕လို အေရးႀကီးတဲ႕ အခ်က္အလက္မ်ိဳးေတြ မသံုးစြဲပါနဲ႕။ သံုးရမယ္ဆိုရင္လဲ Spyware,
keystroke-logger, password-sniffer ေတြလိုမ်ိဳး Software ေတြ အဲဒီ
Computer ေတြမွာ Install လုပ္ထားမထား ေသခ်ာေအာင္လုပ္ပါ။
အထက္ပါအခ်က္ (၁၀) ခ်က္ကိုလိုက္နာျခင္းျဖင္႕ သင္႕အတြက္ ဆိုက္ဘာအႏၲရာယ္မွ 90% ကာကြယ္ ေပးႏိုင္ပါလိမ္႕မယ္။ ဆိုက္ဘာ တိုက္ခိုက္ခံရမႈ အႏ ၱရာယ္မွ ကင္းေ၀းၾကပါေစ။


ၿမိဳ႕ေတာ္ပုသိမ္သတင္း